A Mug's Life
The shape of a pot cannot be dissociated from the way it has been made, one may throw fifty pots in an hour, on the same model, which only vary in factions of an inch, and yet only half a dozen of them may possess that right relationship of parts which gives vitality - life flowing for a few moments perfectly through the hands of the potter.
- Bernard Leach
First: the clay
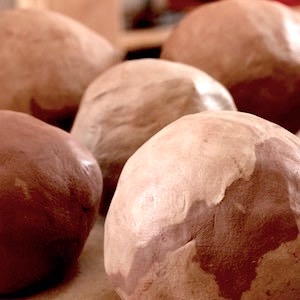 Dirt is supposed to be simple. After all, it’s...dirt simple. But China clay, bentonite, ball clay, stoneware, fire clay,
red surface clay, terra cotta, iron oxide, porcelain, etc. etc.? Clay isn’t exactly dirt but you’ll probably still feel
silly if anyone happens to follow up with, “Yeah, but what is it?” I sure did.
Dirt is supposed to be simple. After all, it’s...dirt simple. But China clay, bentonite, ball clay, stoneware, fire clay,
red surface clay, terra cotta, iron oxide, porcelain, etc. etc.? Clay isn’t exactly dirt but you’ll probably still feel
silly if anyone happens to follow up with, “Yeah, but what is it?” I sure did.
So what is this sticky soft stuff that we dig up from the ground, bake, and then eat off of? Essentially, silica and
alumina. Basically, feldspathic and granite rocks decompose with a little help from weather, time, and glaciers.
That’s Primary clay and it doesn’t sound too complicated - unless you’re digging it, weathering it, and foot
kneading it into submission. In some cases it's not very plastic and a beast to work with.
But why is throwing porcelain like working with cream cheese while a groggy stoneware wears the skin off your
palms? Why does iron clay allergically react to certain glazes?
How come a teapot made from fire clay can be used on open flame while stoneware would likely crack from the thermal shock? Well, fire clay grew up with coal but otherwise...
ENTER: ingredients. Some ingredients are added naturally, like iron, and join up with Primary clay sediment in rivers
to make Secondary clay. Others are clays themselves that were vitrified and ground.
Different clays have different specialties - just like the Avengers. In fact, they weirdly share a lot of the typical superpowers:
Grog or Molocite makes clay gritty and anti-warp tough = the Hulk.
Ball clay makes the clay more plastic = Elastigirl.
Flux makes silica melt sooner and ground bone adds some rigidity (why did you think it was called Bone China?)
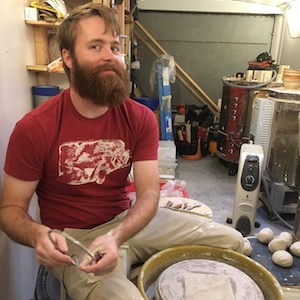
We buy our clay from a local company and tend to use creamy colored, low-grog stoneware but now and again we enjoy a good porcelain, earthenware, or dark iron stoneware. And sometimes we mix two for marbled ware.
Second: throw the clay (or hand build)
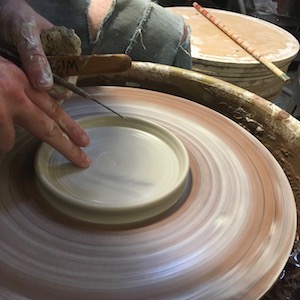 This is probably the step that most people associate with handmade pottery. It’s like the lead singer of pottery. I mean, the drummer is cool too -
what’s his name again? And the guy on the keyboard…wait, there was a keyboard, right?
This is probably the step that most people associate with handmade pottery. It’s like the lead singer of pottery. I mean, the drummer is cool too -
what’s his name again? And the guy on the keyboard…wait, there was a keyboard, right?
There are two popular types of throwing wheels - electric for lazy people like us and kick wheels for people who grew up on them.
The first goal and all-important step of throwing is to center the clay. It is also one of hardest “basics” to master. It involves a bit of pressure and
steady coaxing to convince the clay to get its act together and spin smoothly in the center of the wheel in a process called “wedging.” Stubborn clay
that refuses to center can’t be properly thrown. It's doomed to tear itself in half when pulled into a form and get tossed into the slurry bucket.
There’s a good reason throwing clay on a wheel has been used as an illustration for people for thousands of years.
We hand throw the majority of our pieces with an obvious exception: pendants. Those we slab roll (think heavy rolling pin), stamp or etch, and cut into slices.
Third: wait... and trim
 Once the piece has achieved the shape the potter wanted, it is taken from the wheel and left to dry for a day or so depending on the local humidity. The potter will
check it every now and again until it reaches just the right dryness and feels "leather hard.” At this stage, like with leather, it’s soft enough that you can press your
fingernail into it but is hard enough that it can be handled without deforming it (shameless pun).
Once the piece has achieved the shape the potter wanted, it is taken from the wheel and left to dry for a day or so depending on the local humidity. The potter will
check it every now and again until it reaches just the right dryness and feels "leather hard.” At this stage, like with leather, it’s soft enough that you can press your
fingernail into it but is hard enough that it can be handled without deforming it (shameless pun).
The pot is put back on the wheel, carefully adjusted until it is centered, chucked (braced with clay), and then trimmed as needed. The foot is the usual focus of
trimming as it can be difficult to get clean edges with wet clay but a potter can trim off as much as he likes - defining or even changing the shape - so long as he doesn’t get too excited and trim a hole into it.
There are a variety of trimming tools that neatly slice off layers of soft clay but most potters like to make a few of their own (forming and trimming) tools as well out of everything from dental tools to wire to old saw blades.
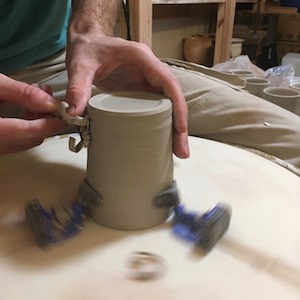
Fourth: handles etc.
 Once a piece is all trimmed up and while it is still leather hard, there is a small window of time where handles or knobs can be added.
Slabs of clay are cut or rolled and then “pulled” into handles, which is pretty much what it sounds like. The potter splashes a bit of water on the clay and gently pulls it over and over until it lengthens into something that looks like a detached handle.
He then cuts it to the right length, “scores” it with a knife or rough edged tool, wets and scores the to-be mug, and joins the two pieces. Some potters
prefer to flip the mug upside down and pull the handle right from the mug - which does help the handle not to stress and crack.
It’s incredibly easy at this point to accidentally smear the mug with the watery clay that is all over your hands. This is rarely a “good accident.” It’s sloppy. Therefore, the final few minutes of this process are all about cleaning things up - particularly the attachment points.
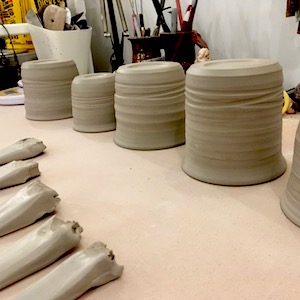
Fifth: wait...
 Lots of waiting in handmade pottery. This time the potter needs to wait for the leather hard mug to get to the bone dry stage.
As you can surmise, bone dry clay has a brittle, chalky feel. It looks like a normal mug (minus the glaze) but it is still just clay and will crumble in your hands if you’re not careful.
But after a day or two, it can face its first round of firing. By the way, pieces at this stage are also called “greenware."
What happens if one were to fire a piece before it had fully dried?
It might explode and send shrapnel careening into your other pieces. Many a hasty first semester art student has learned this lesson the hard way - probably via his very upset, bereaved classmates.
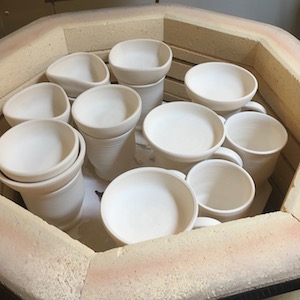
Sixth: bisque fire
 There are usually two firing stages for clays.
The bisque firing is basically a low temperature first firing that changes the chemical makeup of the clay and makes the shape permanent, though still porous -
which makes adding glaze a whole lot easier.
There are usually two firing stages for clays.
The bisque firing is basically a low temperature first firing that changes the chemical makeup of the clay and makes the shape permanent, though still porous -
which makes adding glaze a whole lot easier.
Bisques usually begin slowly, rise until all the tiny water molecules are burned away, and finish at a temperature between cone 05 - 04. In other words 1760F - 1900F.
Potters use pyrometric cones to verify temperatures. These cones are placed inside the kiln in view of the peep holes and melt at certain temperatures. Throughout the firing, the potter will put on beefy welder gloves and certified black or green goggles, take out the peep hole plugs, and look into the red glowing kiln to see how far the cones have bent.
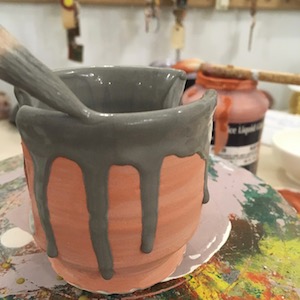
Seventh: glaze
 There are thousands of glazes in categories ranging from rustic Japanese shinos or semi-translucent Chinese celadons to the bright colors of the rainbow.
Like the clay itself, glazes are more complicated than they first appear. Each glaze is basically a chemistry experiment where the potter pulls all the factors together to get the desired color and feel.
Things like flux and silica in the glaze determine when it will melt while the clay, depending on its own composition, won’t vitrify until it reaches certain temps.
Some clays are allergic to some glazes. Some stains don’t like zinc. And some glazes need oxygen. Even the way the glaze is applied depends on its composition - brushing, dipping, or spraying. They're a picky lot.
For instance, if the clay shrinks faster than the glass-like glaze, the glaze will “craze” and be riddled with tiny cracks. This actually looks pretty neat but some people prefer there to be no crackles as there is a chance liquid or food could become trapped inside.
Eighth: fire!
 This is the exciting part; this is the maternity waiting room of pottery.
When I was in University (art minor) you could guarantee that when it was time for the kiln to be unloaded after the multi-day firing process, anxious art students would be lined up
and pacing outside the kiln room. There were cries of joy and groans of despair as the pieces were slowly unloaded and handed to their respective parents.
This is the exciting part; this is the maternity waiting room of pottery.
When I was in University (art minor) you could guarantee that when it was time for the kiln to be unloaded after the multi-day firing process, anxious art students would be lined up
and pacing outside the kiln room. There were cries of joy and groans of despair as the pieces were slowly unloaded and handed to their respective parents.
“Gloss” firing is a technical term for this second fire when the glaze melts onto the clay. Depending on the clay and glaze types, it ranges from a tad hotter than a bisque to high fire cone 6 or 10 (upwards of 2300F).
There are also several methods of firing: wood firing, raku, oxidation (usually electric), and reduction (no oxygen because the fire eats it). Each method has its own unique results. Oxidation keeps any oxides present for certain color responses. Copper oxide, for instance, produces green.
Some methods are relatively quick (only 4-6 hours) while others may take days.
Currently, we fire up to cone 6 oxidation in an electric kiln but soon we hope to build a raku kiln and if we ever get any dirt of our own to live on, perhaps a large brick reduction kiln.
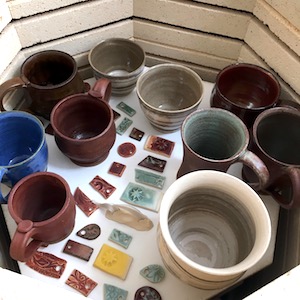
Ninth: voila
 At least, it’s supposed to be “voila!” Sometimes it’s closer to despair as over a week of work and materials go to the trash - or to the skeet range. No need for it to be a complete waste, right?
“Seconds” are pots that just aren’t up to snuff but are still useable. These are generally sold at a discount as an acknowledgement of their defects.
And then, there are those happy few that make it and are all you ever hoped for. Then all you have to do is photo them, write up descriptions, and post them for sale so that you can buy more materials and a decent snack after all that work. Thankfully business stuff only takes like 12 more hours…then, back to the making!